Looking to perfect your still-life drawing game? This easy Procreate tutorial is here to help! Read along for a simple yet comprehensive step-by-step guide on how to draw carrots digitally using iPad Pro.
Digital drawing continues to thrive as an exciting medium in the world of art. Many famous illustrators have created truly remarkable work using Procreate on iPad Pro, and now it’s your turn to try out the amazing tools this artistic medium has to offer.
This realistic carrot drawing Procreate tutorial will break down the process of illustrating on a tablet and set you up with the basics of this amazing app. We’ll use how to draw a carrot as our example!
How to Draw Carrots: Drawing on iPad
I’m a Toronto illustrator who specializes in book illustration, portraiture, editorial illustration and exhibition design. Over the last few years the digital medium has become an important drawing tool for me and a integral part of my illustration process overall.
If you are new to digital drawing I am sure you’ll be amazed, both by how easy it is to pick it up, and by the new range of drawing potential it provides. Creating illustrations of everyday things around your home, like a carrot, with an Apple Pencil on iPad Pro, allows for new and advantageous ways of creating layers, texture, and dimension, and is also really quite fun.

Sketch A Carrot Drawing In The Kitchen
The carrot is a root vegetable, typically orange in colour, though purple, black, red, white, and yellow cultivars exist, all of which are domesticated forms of the wild carrot, which is native to Europe and Southwestern Asia.
When they were first cultivated, carrots were grown for their aromatic leaves and seeds rather than their roots. Carrot seeds have been found in Switzerland and Southern Germany dating back to 2000–3000 BC. Some close relatives of the carrot are still grown for their leaves and seeds, such as parsley, cilantro, fennel, anise, dill and cumin.
One of the best ways to become an expert on how to draw carrots is by visiting your local farmers market. At my favourite farmers market in Toronto there is an urban farmer who grows beautiful heritage varieties.
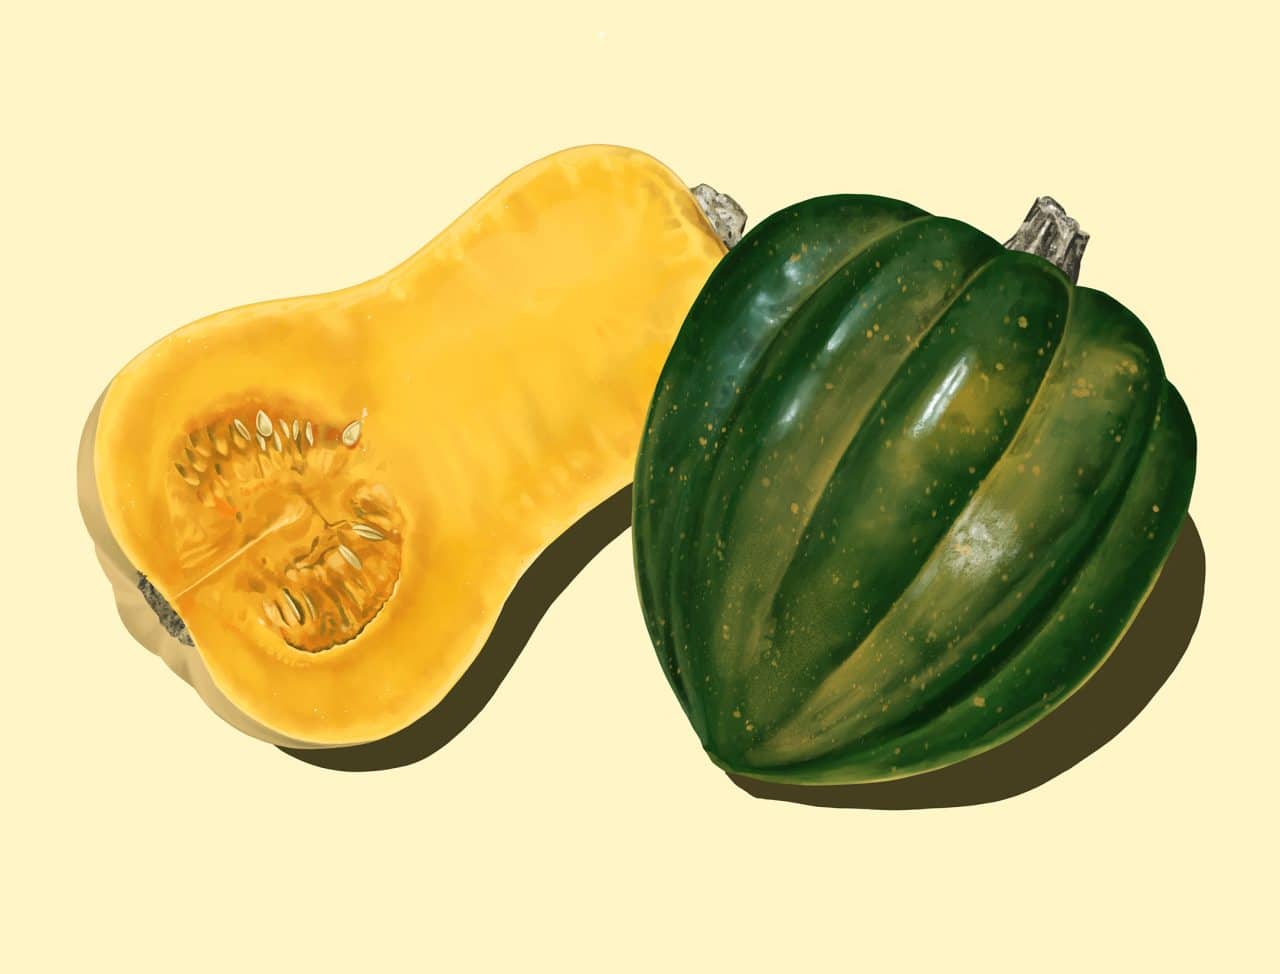
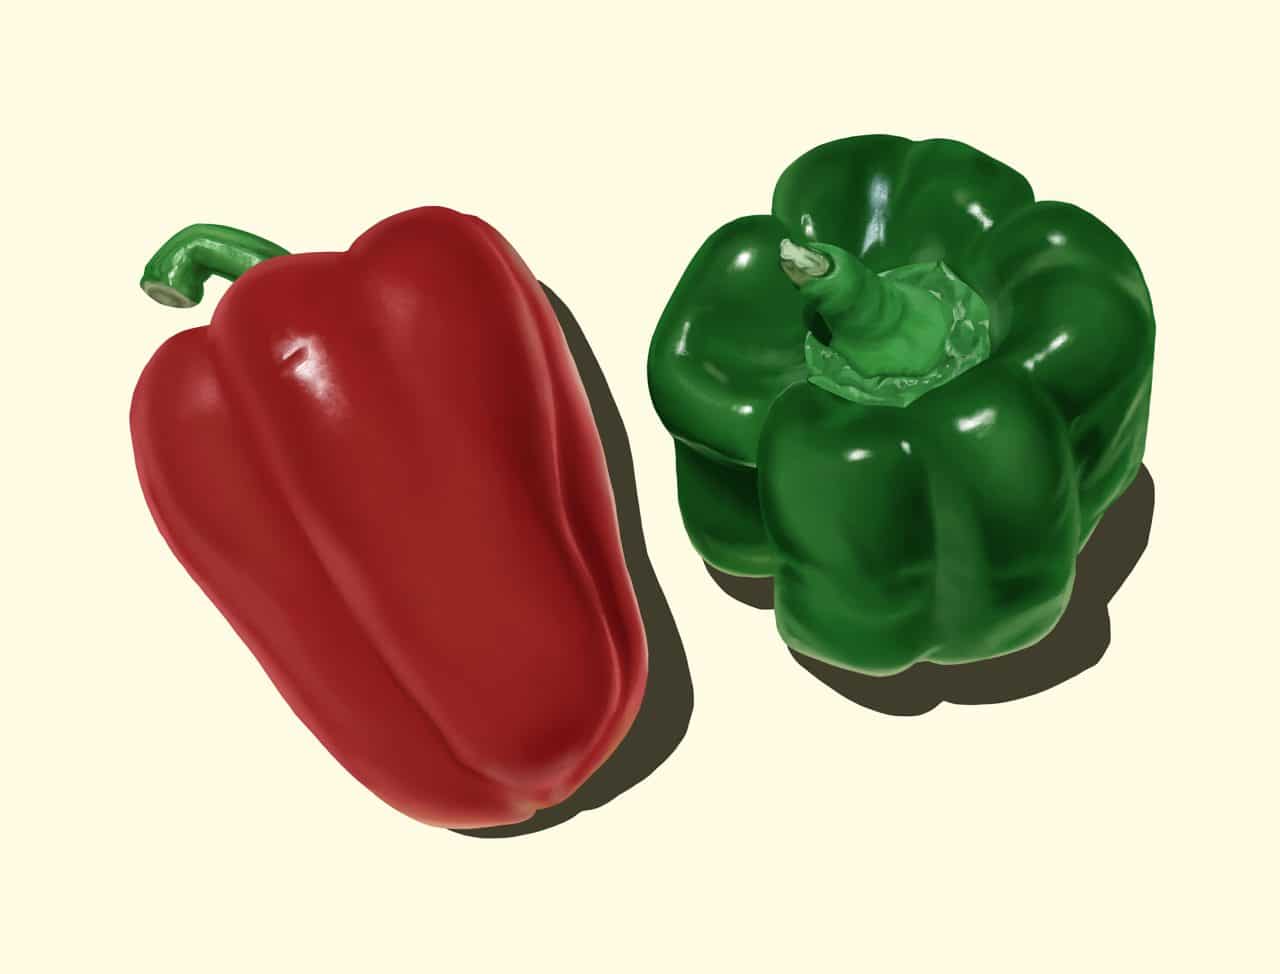
A diversity of colours, shapes and textures helps make a still life vegetable portrait more interesting. Be sure to arrange the carrots on your kitchen counter to photograph in ample natural light.
You’ll of course need to eat up those carrots once you’re finished drawing so why not cook one of our popular carrot recipes such as Fermented Carrots, Banana Carrot Muffins, and Carrot and Leek Soup.
Carrot Drawing Procreate Tutorial
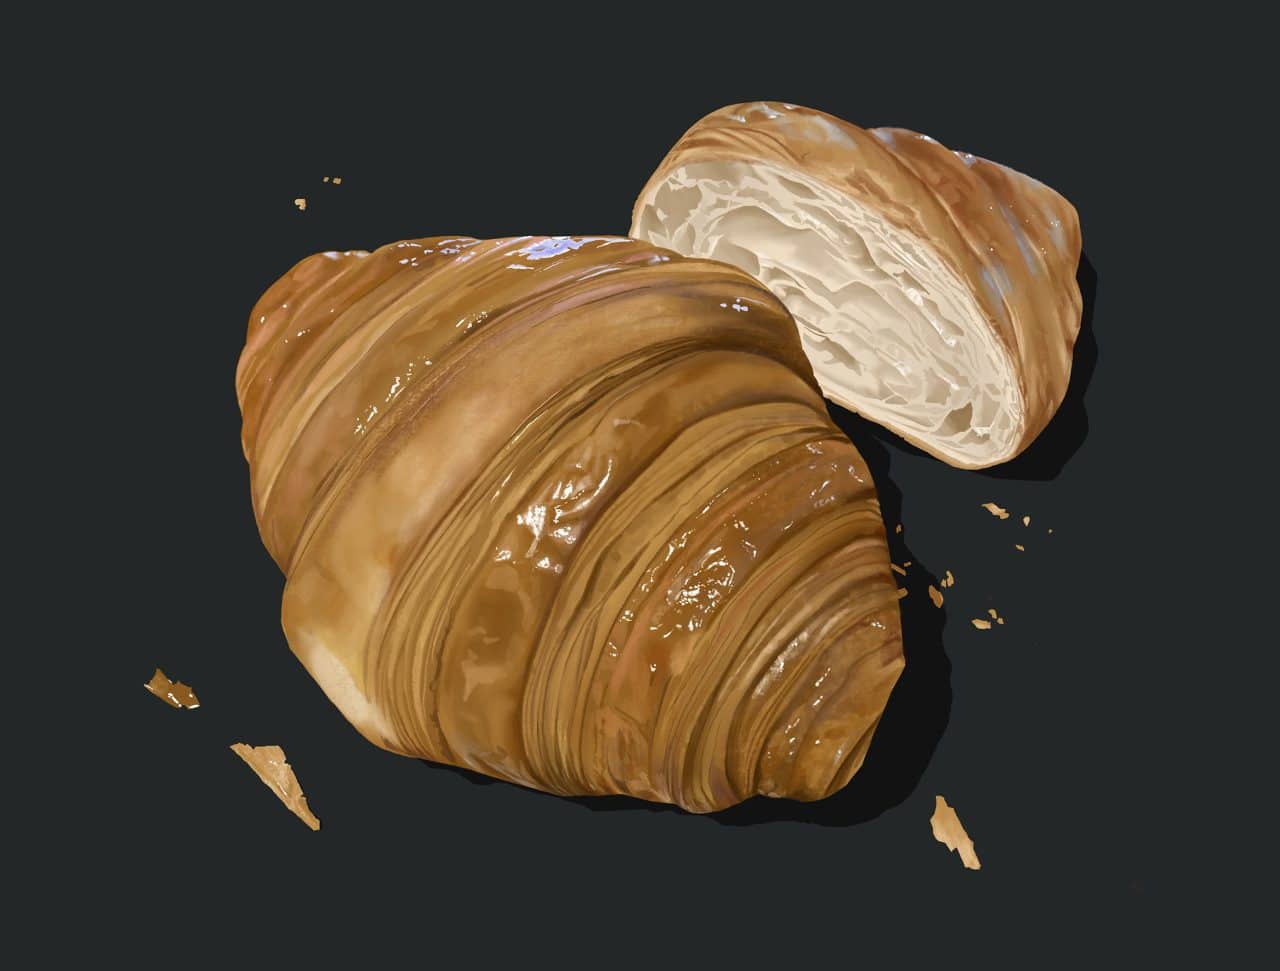
How does one make art out of… a carrot? Possibly one of the most mundane sounding subjects since “how to draw potatoes,” a carrot doesn’t necessarily inspire immediate aesthetic wonder.
However, even I was surprised by how many more details there were to it than I thought, like an impressive depth of colour, and an unsuspecting way that light reflects off its skin. By the time I finished I began to think that maybe it’s about time this plain jane root vegetable got some time in the spotlight.
Speaking of vegetables, carrots, like other food items, are frequent subjects for still life drawing. Still life drawing utilizes non-living, everyday objects that are good at holding still, as subjects to practice drawing techniques like light and shadow, colour, shape and texture. And our carrot drawing will have all of these things in spades.
Luckily for you Procreate makes recreating telltale carrot features in your drawing fun and easy. And this procreate tutorial on how to draw carrots will break down the process into separate steps that will have you creating a still life carrot masterpiece in no time.
Not to mention, the Procreate methods you’ll practice using in this tutorial will create the benefit of adding many exciting new tools to your art arsenal!
Procreate Tutorial: How to Draw Carrots with iPad Pro
Let’s first get set up with a new canvas in Procreate. When you first open the app you’ll be in the “gallery” where all of your artworks will be visible. Tap the “+” in the top right of the screen and a menu will appear where you can select your canvas size.
To choose your dimensions click “create custom canvas” and enter them (in mm, cm, inches, or pixels). You can simply select “screen size,” however I recommend going bigger so that you have the option to print your finished piece with a nice resolution.
For my carrots drawing I’ve created an 11″ x 14.5″ canvas. I’ve gone with a resolution of 300 DPI, which allows for up to 35 layers. If you go too big the maximum number of layers you can have in your artwork can be too few for our purposes, this is a good size.
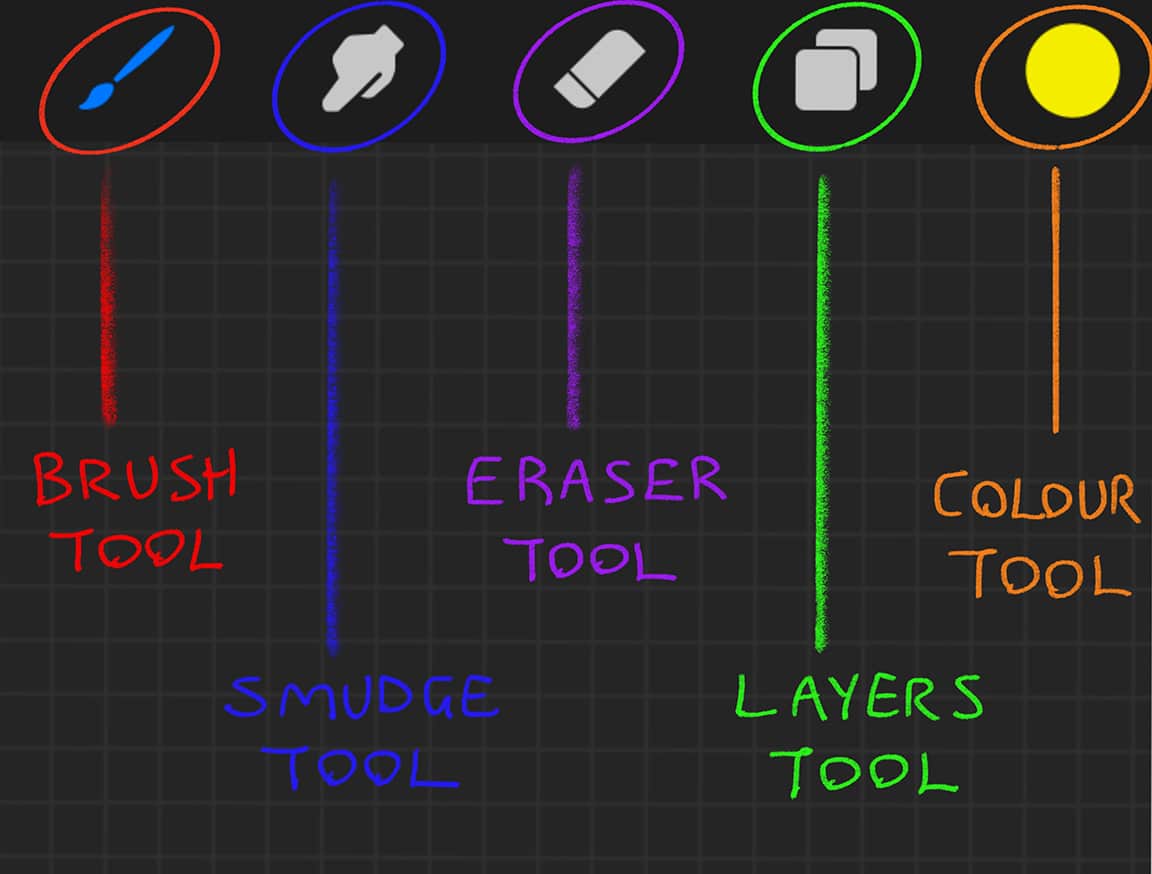
Now it’s important to explore and familiarize yourself with Procreate’s basic tools. Starting with the toolbar on the top right of your canvas.
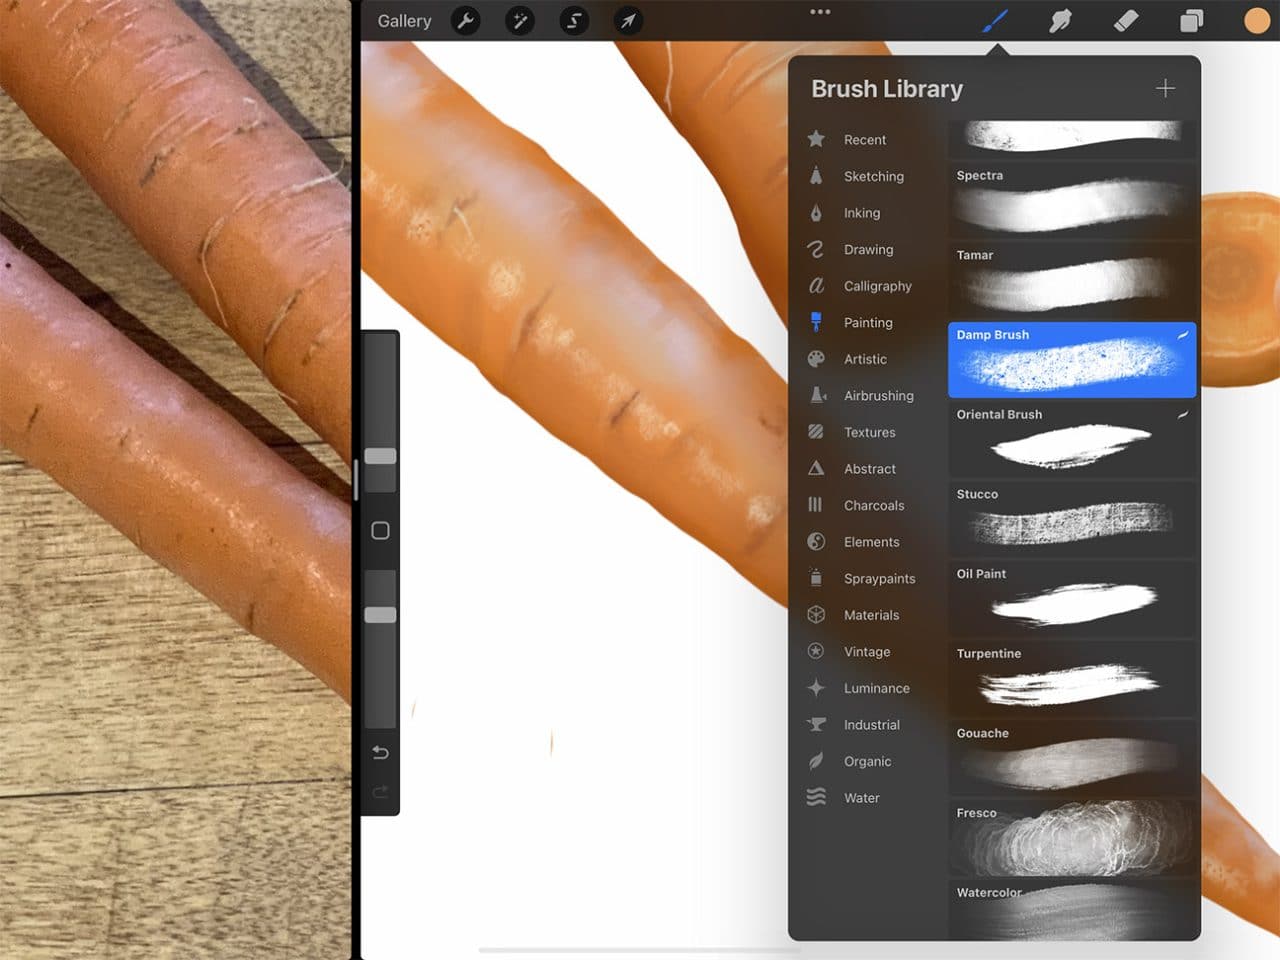
- The Brush Tool: This is the tool with which you draw/paint. Tap it to open your Brush Library. Procreate’s brushes are categorized in a list down the left side of the drop down menu. Tap any of these to see your brush options in each category. Choose what you like and then tap the brush icon in the toolbar again to close the menu. Now get scribbling! Try a few different brushes and use different pressures and angles of the Apple Pencil – it’s remarkably realistic in its response to your hand.
- The Eraser Tool: It does exactly what you think it does! Tap it and you’ll open an identical Brush Library as tapping the brush tool. Try a few and see how it erases your scribbles.
- The Colour Tool: This is your colour palette. Tap and it will open in its default view of “Disc.” Use the outer wheel to select colour, and the inner circle to select lightness/darkness. Or you can use the square view that combines the two. When you’ve chosen the colour you want to use, tap the colour icon in the toolbar again to close the menu. Again, do some scribbling! Choose a variety of brush and colour combinations to get a feel for the colouring process.
- The Smudge Tool: This is used to blend colours and create gradients. This tool has the same effect as taking your finger to pencil on paper and rubbing it to blend. The smudge tool mimics the real thing fairly well but it does take some getting used to.
- The Layers Tool: You can use this menu to create multiple layers on your canvas, and select between them. How to do this, and the benefits of layers, will be best understood by following through my own example here in this Procreate tutorial.

Then there are the slider toolbars on the left side of your canvas.
- Brush Size: The top slider. Tap, hold and move up and down to adjust the size of your brush tip. A preview window will open up to help guide you. This slider is used for your brush, smudge and eraser tools in the same way.
- Brush Opacity: The bottom slider. This works the same way as the brush size slider, but is for brush opacity.
- Undo/Redo: Under the sliders you’ll see these two buttons. Tapping the undo button will undo the last stroke you drew/erased. Vice versa with the redo button. This is a very useful tool you’ll probably use a lot. You can also undo by tapping once anywhere on your canvas with two fingers.
There is also the toolbar in the top left of your canvas. For these tools I will point them out and explain them along the way as we need them.
How to Draw Carrots Step One: Choosing a Reference Photo
If you can take your reference photo yourself, great. You can use the iPad itself to capture a good photo.
If you don’t have any carrots handy, there are plenty of images online for you to choose from. It’s a good idea to chose one that is copyright free and there are several websites that have large libraries of free images.
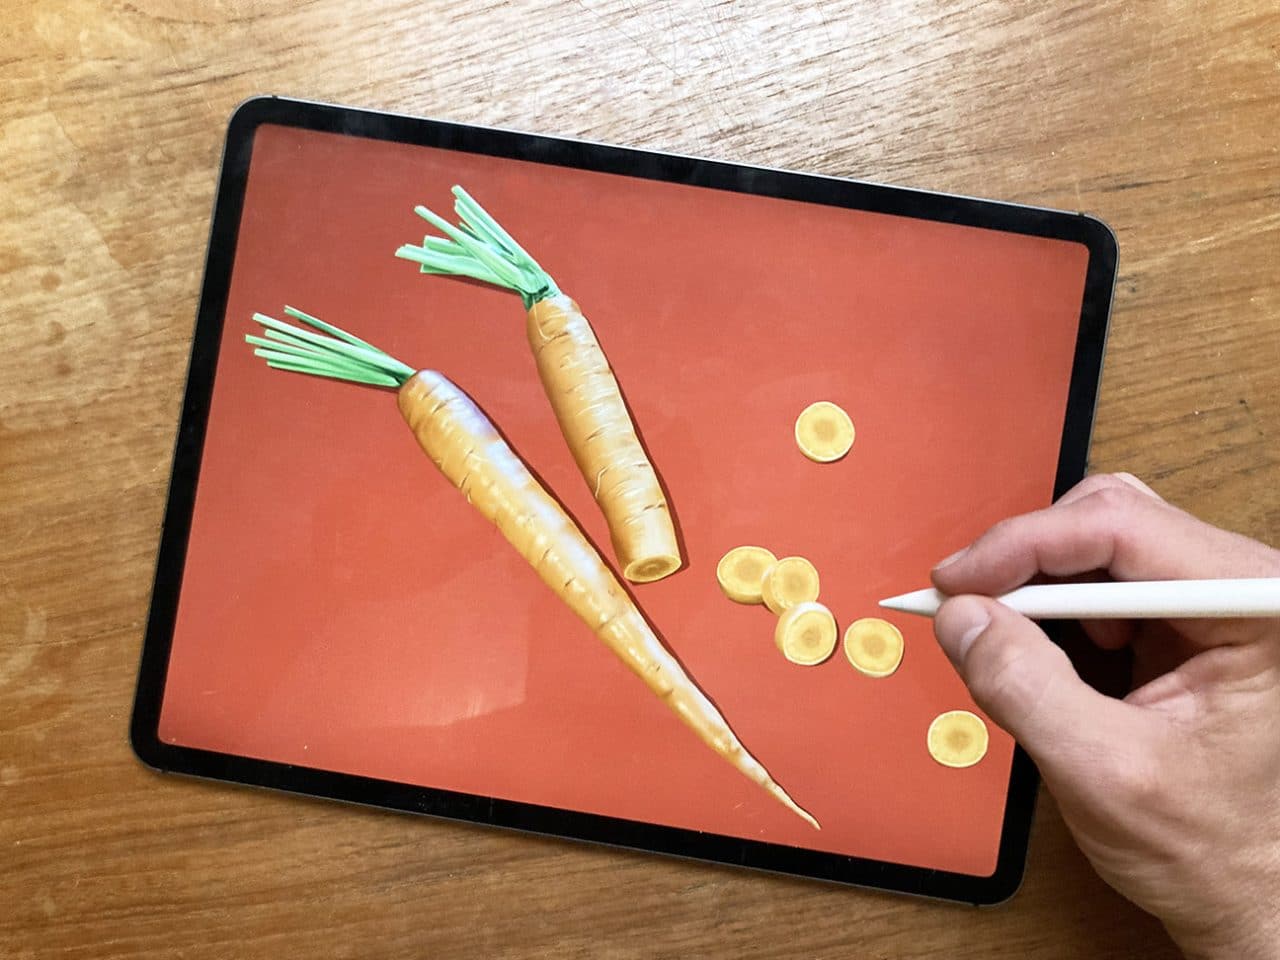
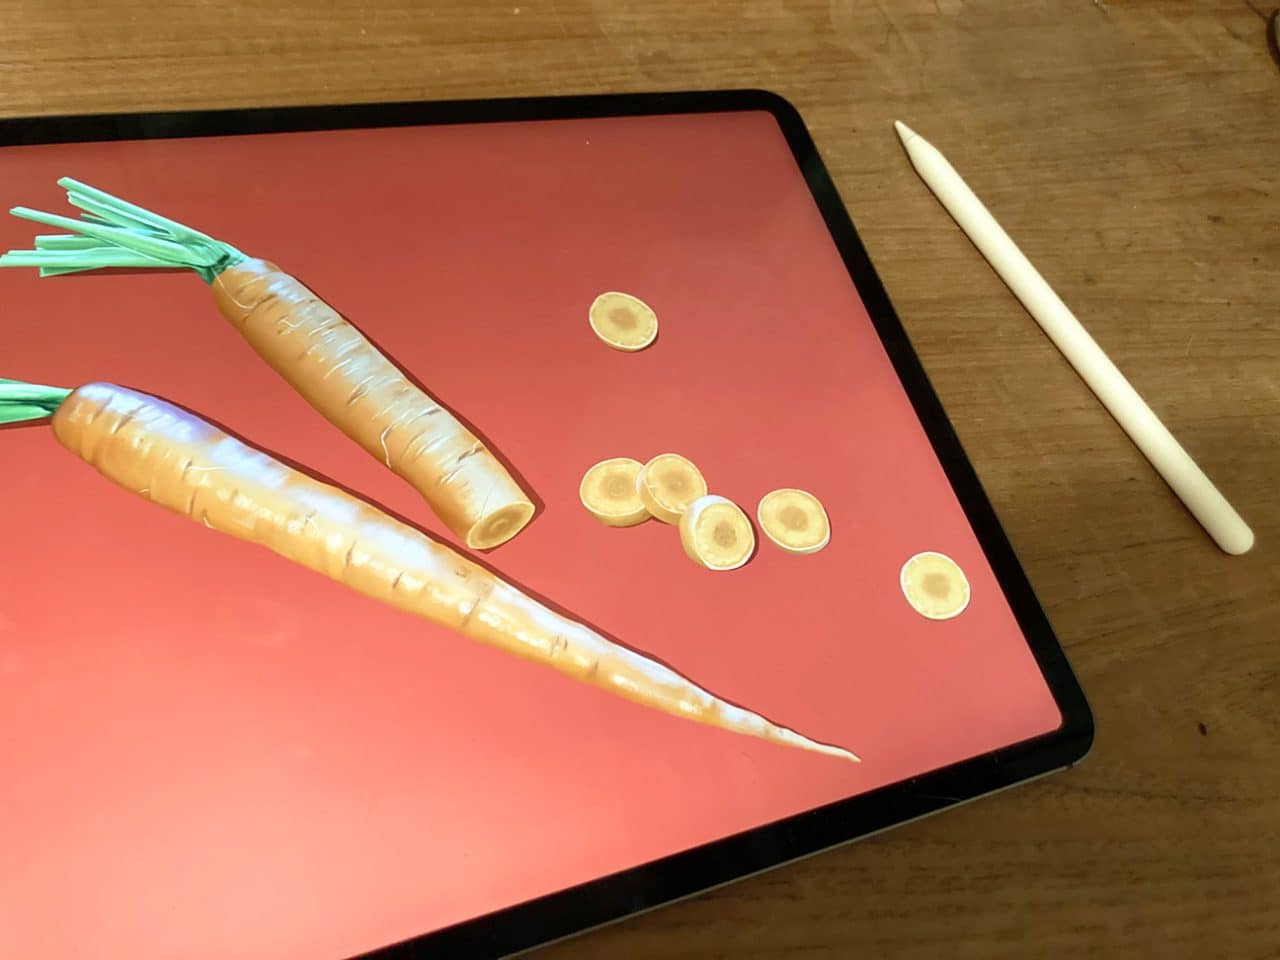
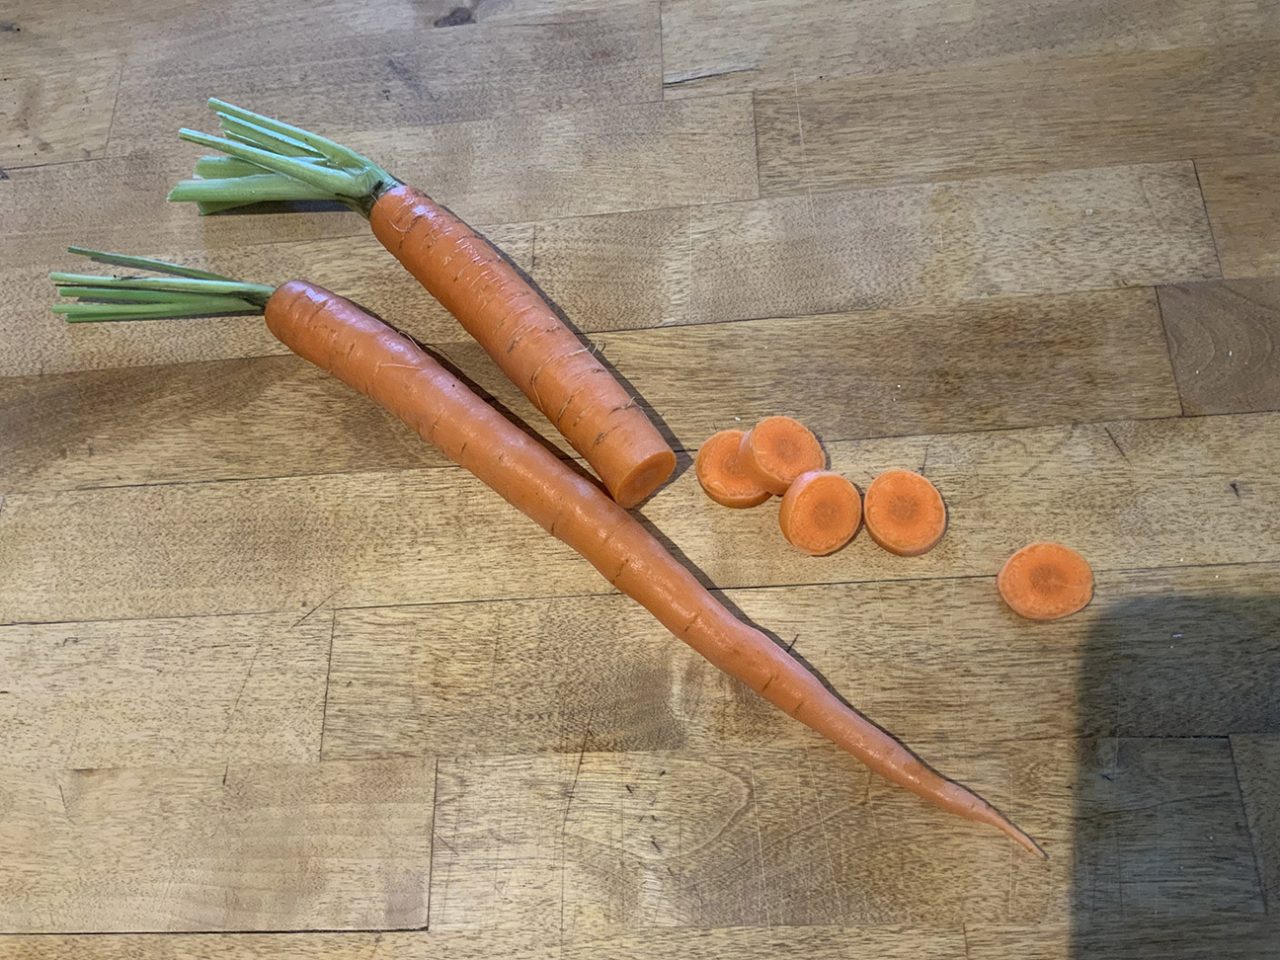
I took my reference image myself in my kitchen. I took two carrots from the bunch I bought (the kind with the greens still attached) gave them a good wash and then set them up in a spot where they were well-lit and caught a bit of a shine.
Unfortunately for the one on the right, I did some chopping, just to show a bit of the interior texture of the carrot. And to play around with the little carrot discs that came of said chopping to create a pleasing composition overall.
The first thing to do before you get to drawing is to set up your reference photo to work from. A great option with iPad Pro is that you can keep your photo open in a window beside your Procreate canvas while you work.
To do so, tap and hold the bar at the bottom centre of the screen in Procreate, then slowly pull up the iPad menu (if you swipe too quickly you’ll close Procreate).
Once the menu is up, tap and hold the photos icon, and drag it to the left side of the screen (or right side, for the lefties out there!) Pull it past the edge of the Procreate window and drop it there and tada, you have both open at the same time. You can also adjust the size of the photo window by holding and sliding the side bar of the window.

How to Draw Carrots Step Two: Blocking Your Shapes
Now you are set up to start drawing carrots!
The first step will be blocking out the shapes of the pieces of carrot with a solid colour. For this outline I used the studio pen brush under “inking” in the brush menu, because it gives a nice clean line.
To determine which colour to use, I took a look at my carrot reference photo and tried to match it generally to the “average” colour tone of each of the pieces. Your outline does not need to be perfect by any means (part of the beauty of drawing a fruit is that it is naturally imperfect!)
Once you have a fully enclosed shape, you can fill it in with solid colour by tapping and holding the colour icon in the top right, and then dragging it to the inside of your shape and releasing. The shape will then fill with that colour. Make sure your shape is fully enclosed or the “fill” will fill the entire canvas. If this happens just tap your canvas with 2 fingers to “undo.”
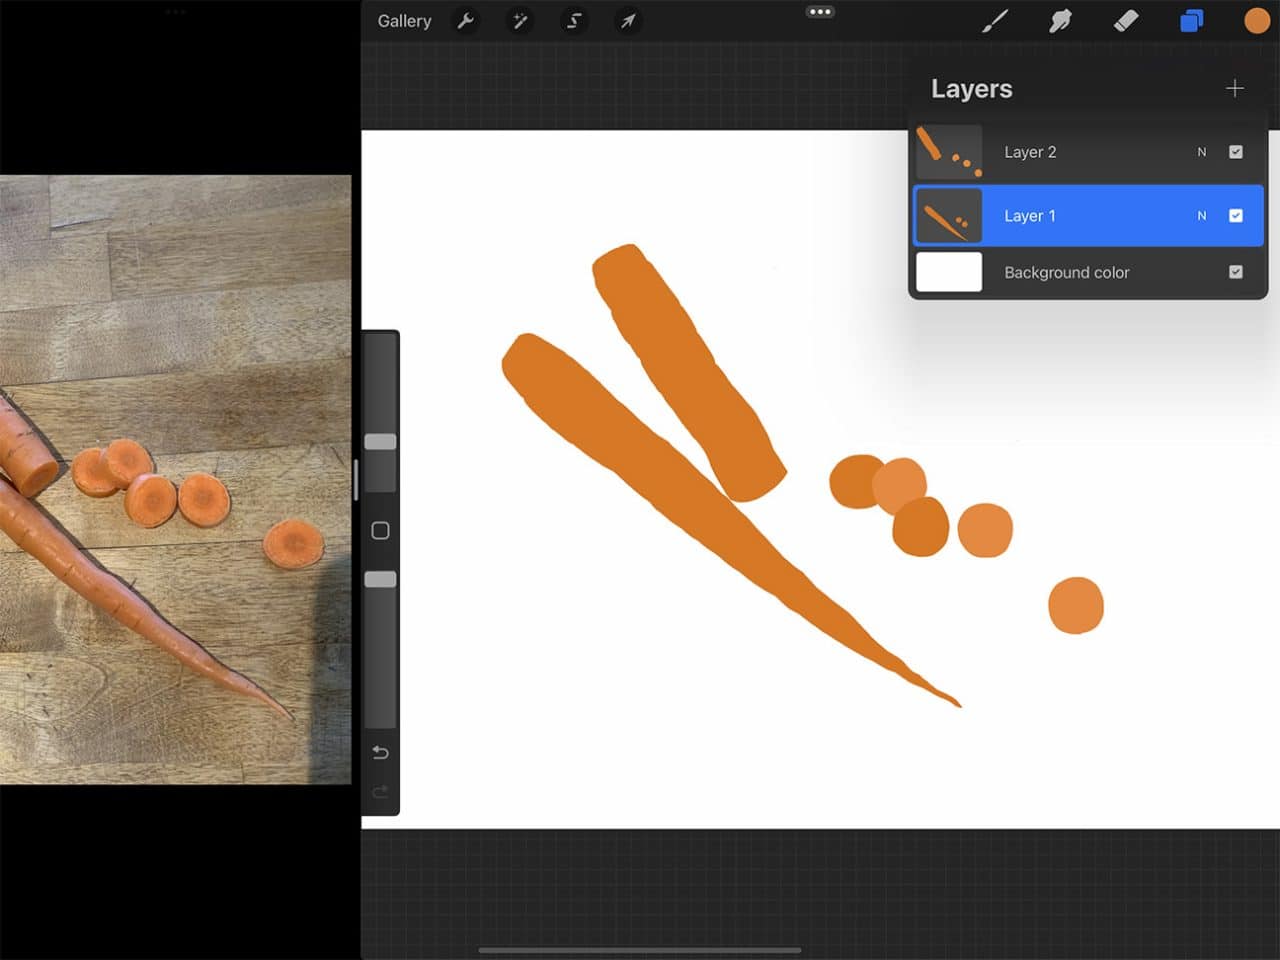
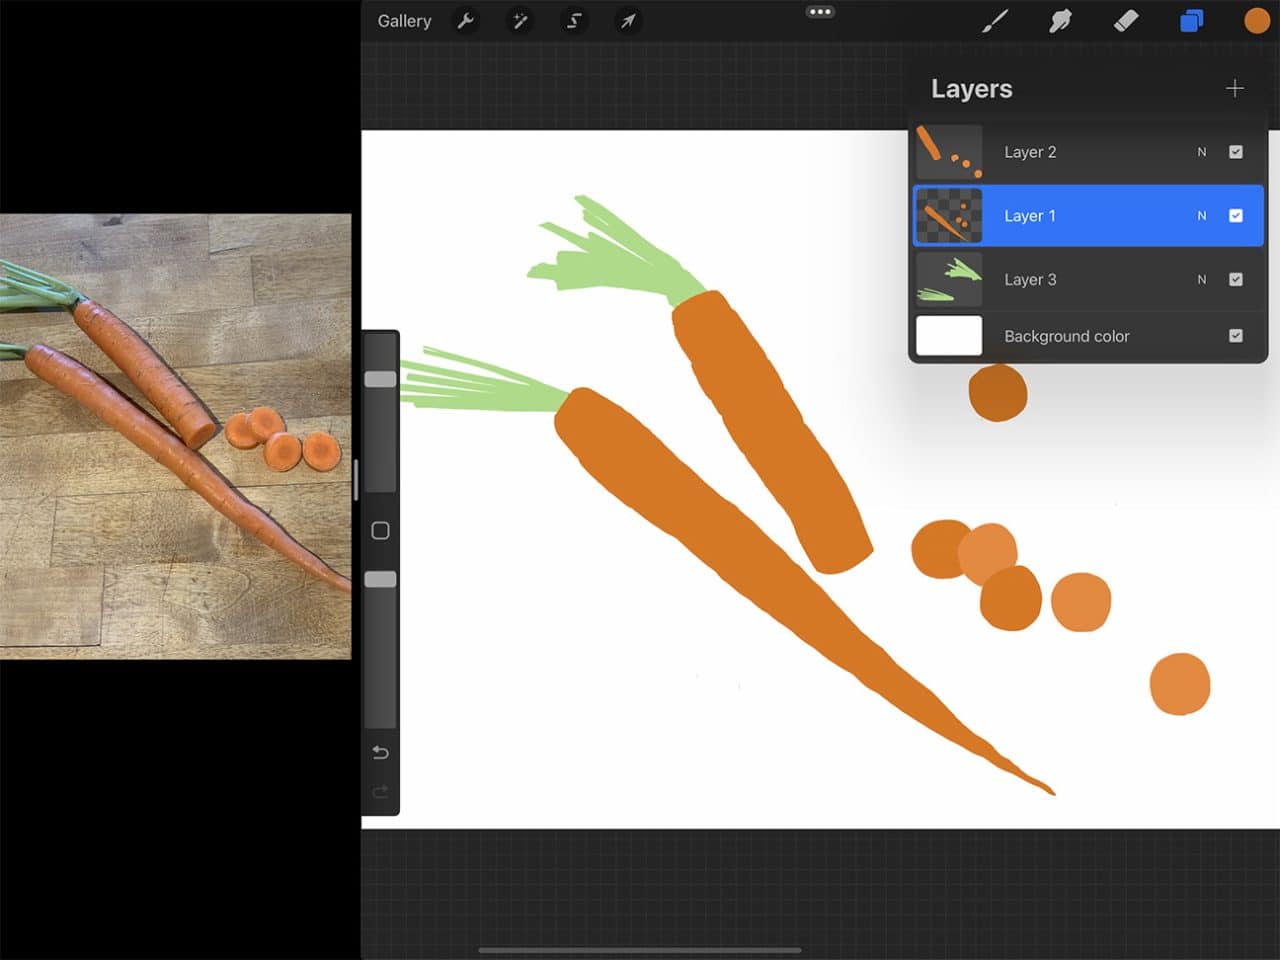
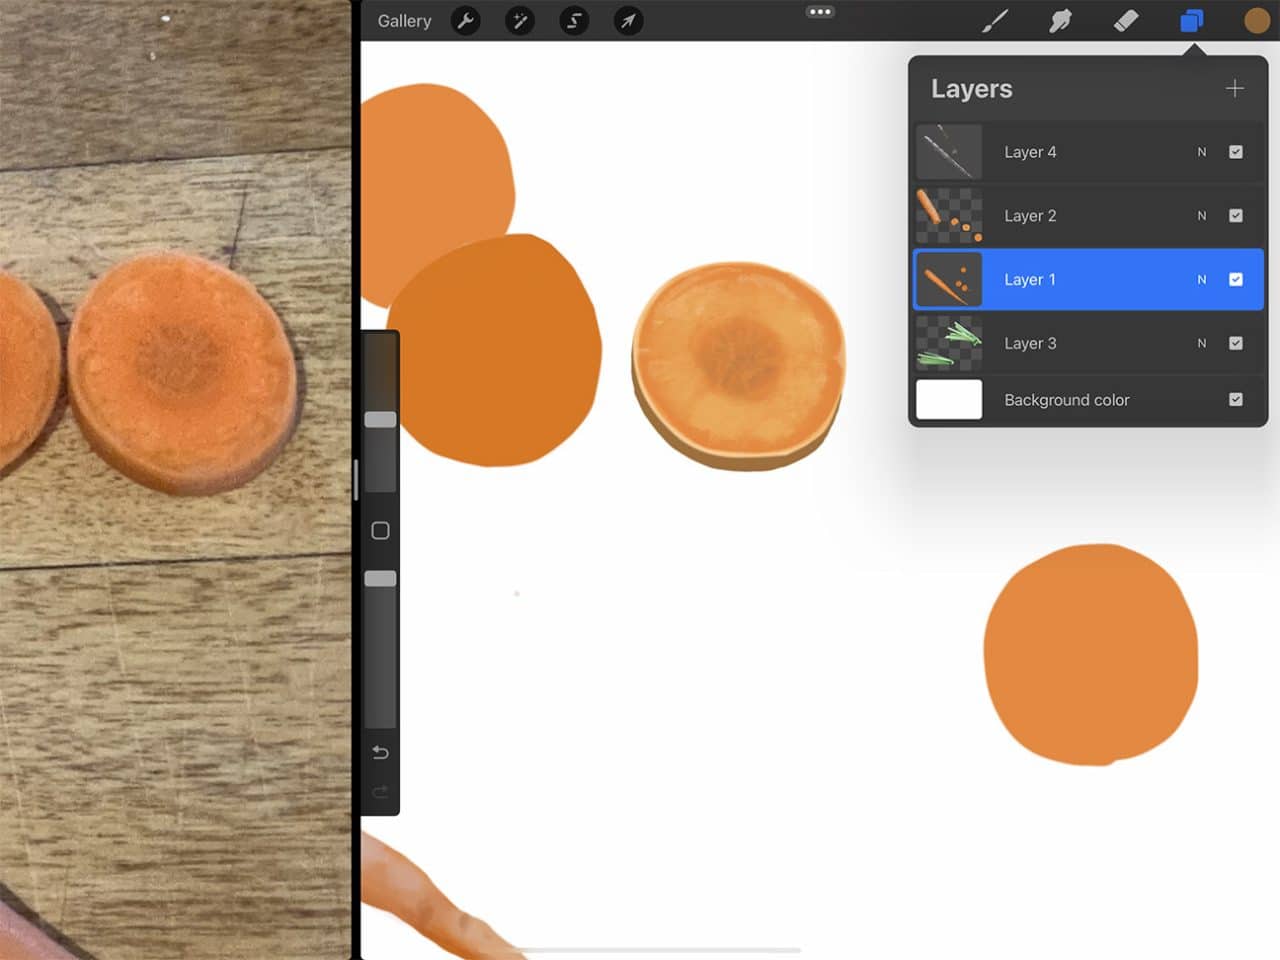
You may find it helpful to separate these shapes onto separate layers. I kept my “whole” carrot on a different layer than the carrot I had cut in half, just to make sure the separate elements didn’t bleed into one another when editing. I also dispersed the carrot discs across two layers for the same reason, making sure that if any of them overlapped they were on separate layers. I also did the green stems on their own layer.
To create a new layer tap the “layers” icon in the top right menu, and then tap the “+” in the drop down. You can tap and hold any layer in the menu and drag it above or below other layers.
You can adjust the size and position of different elements in your blocked shapes by utilizing the “lasso” tool. That is the tool in the top left menu that looks like the letter “S”. Tap it, and then make sure “freehand” is highlighted in the bottom menu. Then you can use your Apple Pencil to draw around the part you want to adjust.
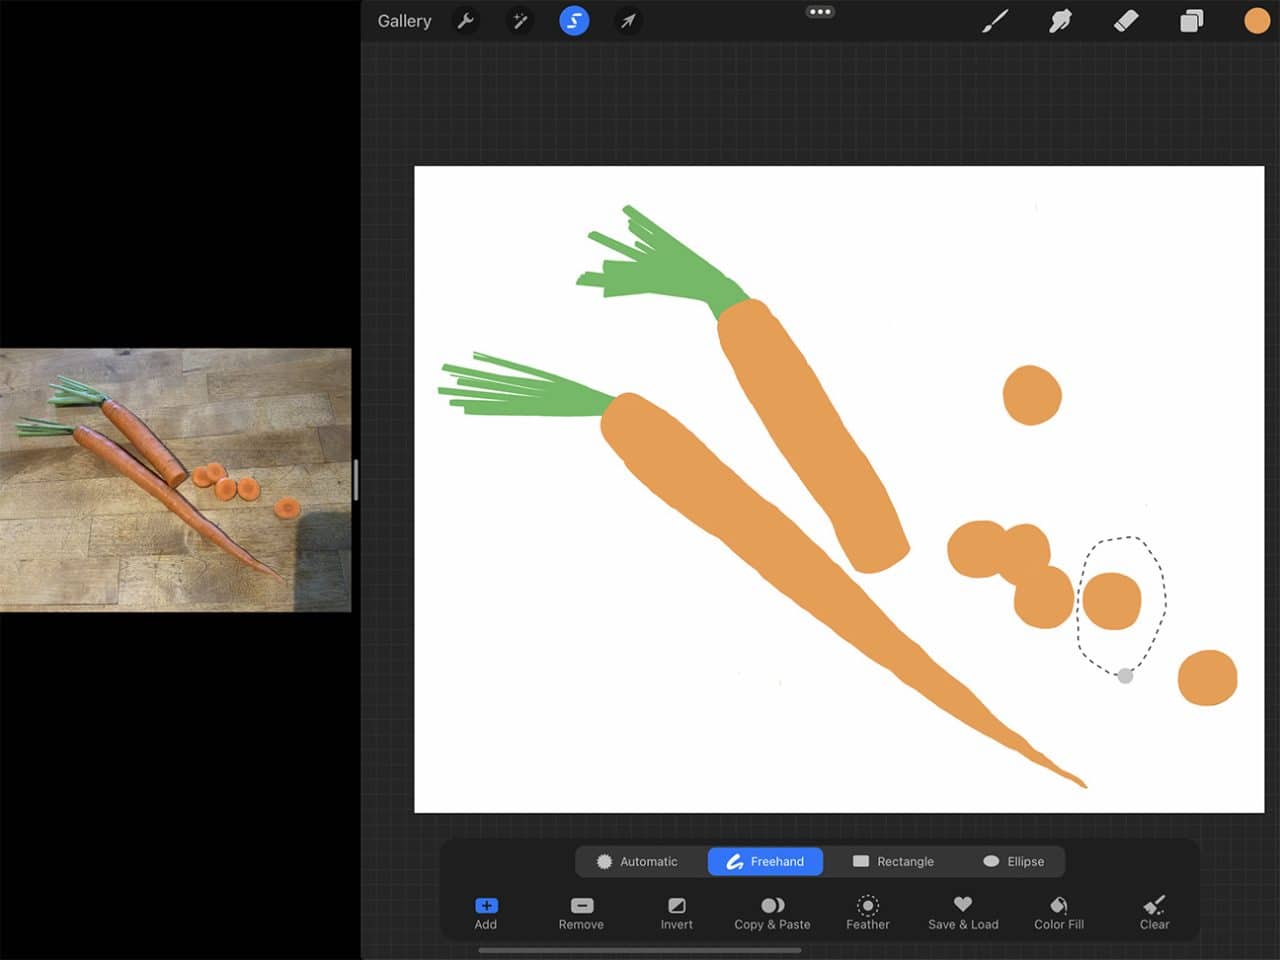
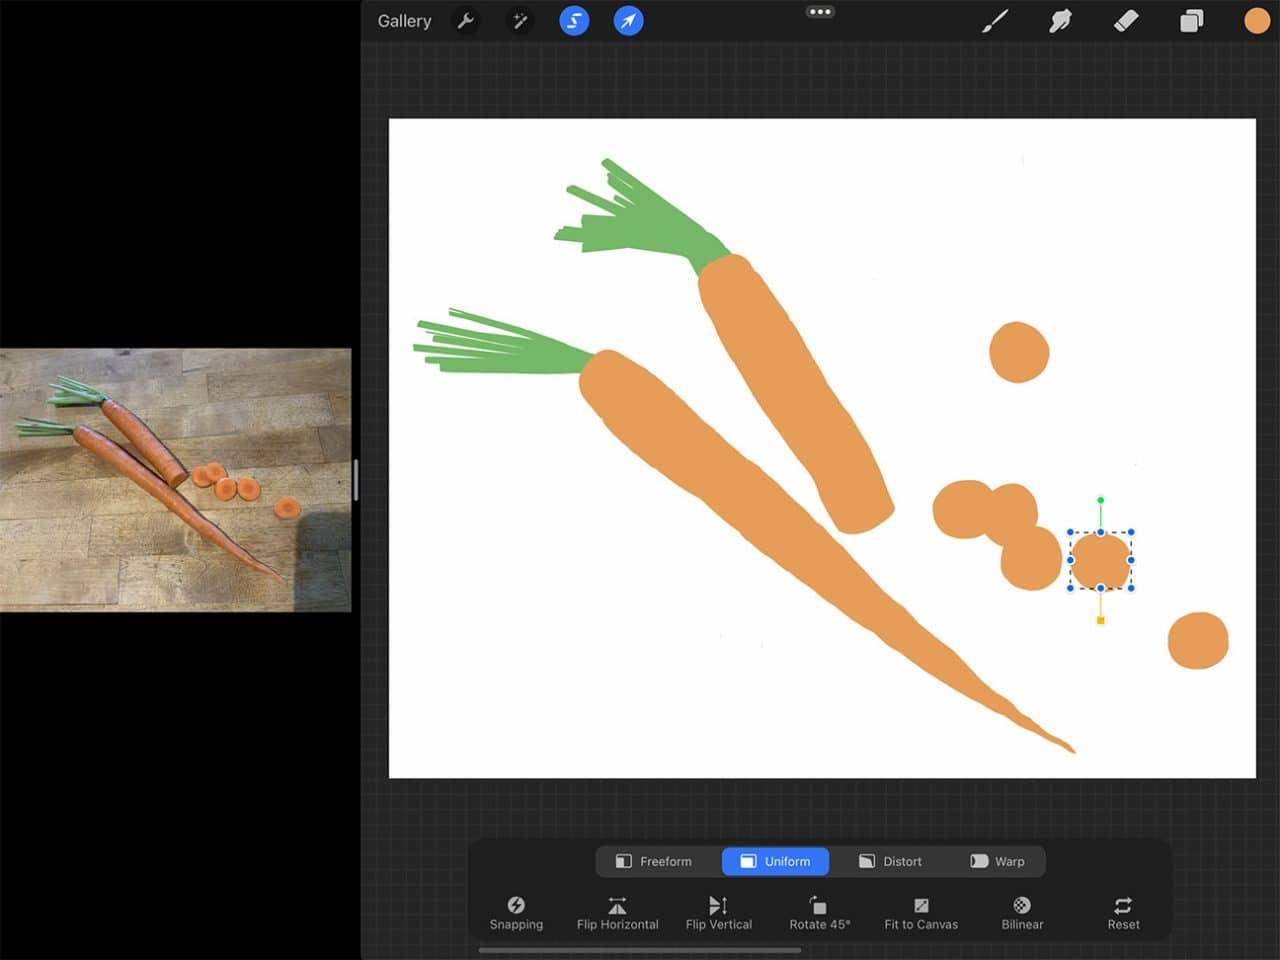
One you’ve traced around that portion, tap the cursor tool in the top left menu and you’ll see a bounding box appear which you can use to make adjustments. For example, I adjusted the size and position of the all of the elements right after blocking them out in order for them to better fill the canvas.
How to Draw Carrots Step Three: Underlying Gradients
Now that you have your base layers of colour you can start “painting” and adding layers of colour to build up the texture and details of your carrots. Take a good look at your reference photo and try to see the underlying gradients of light and dark tones beneath all of the finer details.
For this part you do not necessarily need to be very tidy with your painting. You can roughly paint out lighter and darker areas and then blend and smooth them out using the smudge tool.
For this part I chose the “gouache” brush under “painting” in the brush menu, just because I like the way it blends after the fact. Feel free to use whichever brush suits you though as you will be blending a lot of it out anyway.
Procreate has a feature that makes this painting and blending part a lot easier, called the alpha lock. If you “alpha lock” a layer, you can only paint on what already exists on that layer. Meaning when blending out some colours you don’t need to worry about your smudges coming past the edges of you blocked out shape.
To alpha lock a layer, open the layers menu. Using two fingers, swipe the layer you want to lock to the right. If you’ve done it successfully the layer thumbnail will get a checkered background. To un-lock the layer at any point simply swipe it with two fingers to the right again.
Now you can “paint” out your colours and smooth them into one another using the smudge tool. Play around until you have a gradient of colour that primarily creates a three-dimension look when zoomed out. Remember all of the crisp and fine details will be added on top once you are finished this part.

For the carrot that is cut, I painted away just kind of ignoring the exposed blunt end where the cut happened. It will be easier for you to finish your blending and drawing of the rest of that carrot and then draw the cut end after in isolation.
How to Draw Carrots Step Four: Finer Details
Once you have the underlying tone gradients complete you can start adding in the finer details. I recommend doing these on a new layer so you can edit them without messing up the gradients you’ve already created underneath. This is where is is helpful to zoom in and take a good look at the ridges and topography of the carrot skin.
One thing I noticed was how many of the dark ridges also had a line of highlight right next to the dark. Once I added that complimentary element the ridges immediately looked more realistic.
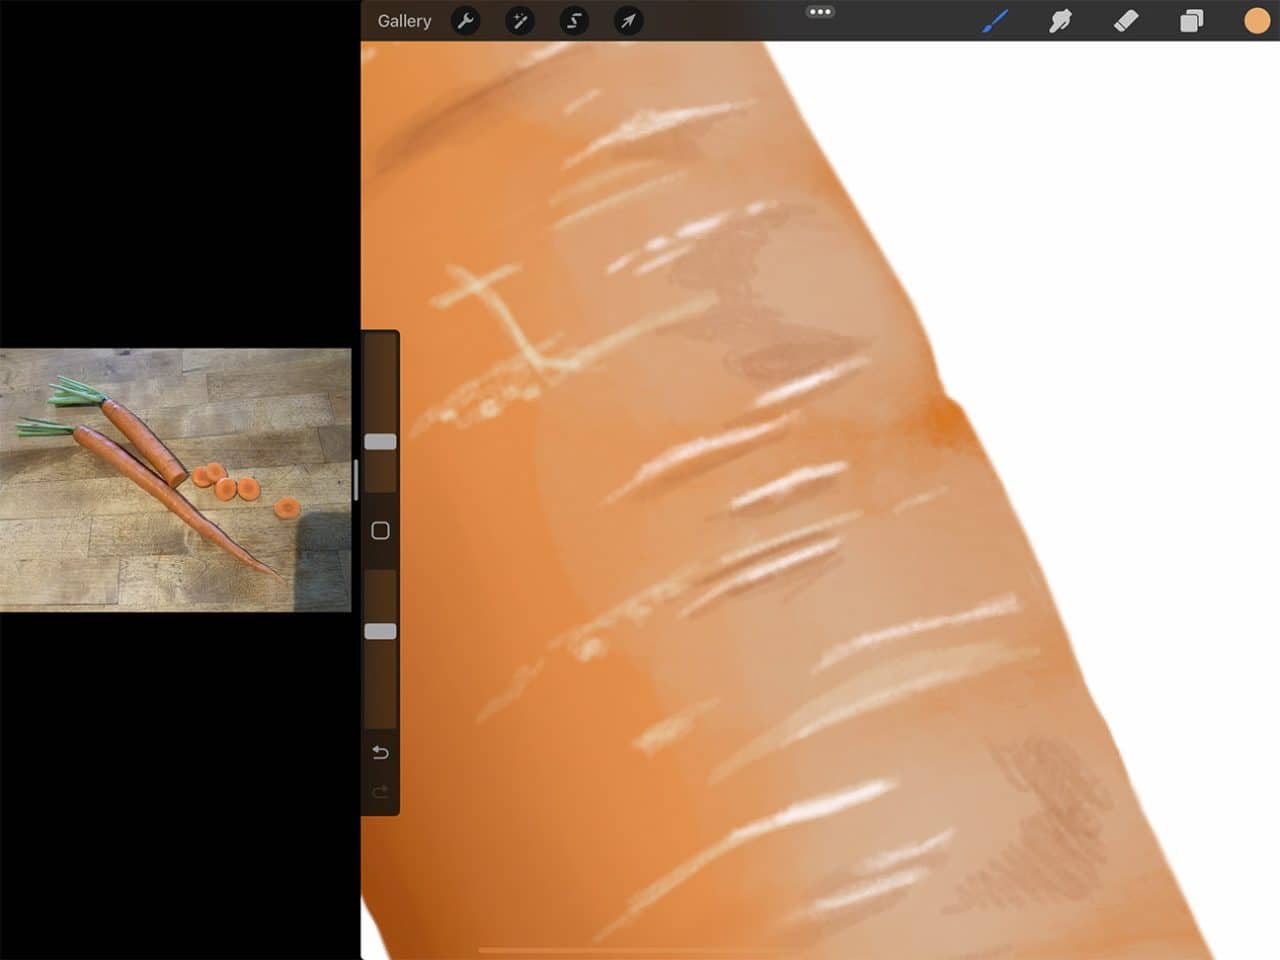
Make sure to really take notice of what colours you find within the highlights in your reference photo as well. In my complete carrot there is a large area of shine, and when I looked close I realized that the shine contained a very purple hue, rather than just a lighter version of the base orange, as you might expect. Honouring these tones will give you a much more realistic finished product.
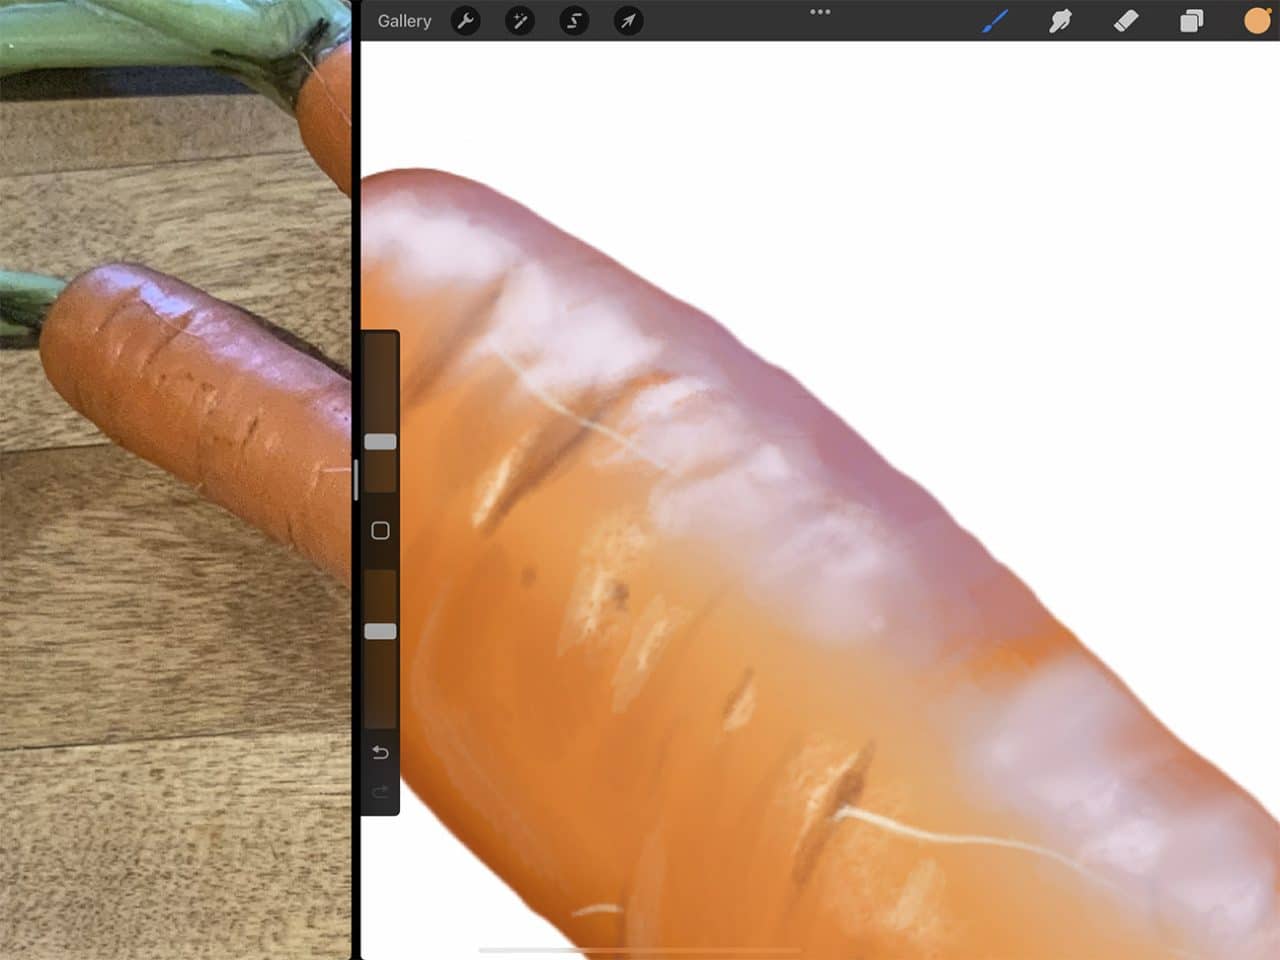
For these highlights also try to built up to your brightest tones, going darkest to lightest. This will also make for a more realistic effect. Blend out using the smudge tool as needed.
Feel free to also experiment with different brush tips for different effects. For example, to create the line of yellow highlights that ran more down the centre of the complete carrot, I selected the “damp brush,” and blended very little, because that brush created a look that mimicked the highlights in the reference photo very well.
The final details I added to the skin were some of the small “hairs.” For these you can use a fine tipped and sharp brush like the “technical pen” under “inking.”
Remember if ever you want to undo a certain stroke, just tap the screen once with two fingers. You can go back as many strokes as you like this way, Procreate remembers everything!
How to Draw Carrots Step Five: Stems
For the stems you’ll build up your drawing in much the same way as your carrots. It will be helpful here to really zoom in and study the small details that define the bundle of greenery. For these it will be helpful to utilize the lasso tool again, however in a slightly different way.
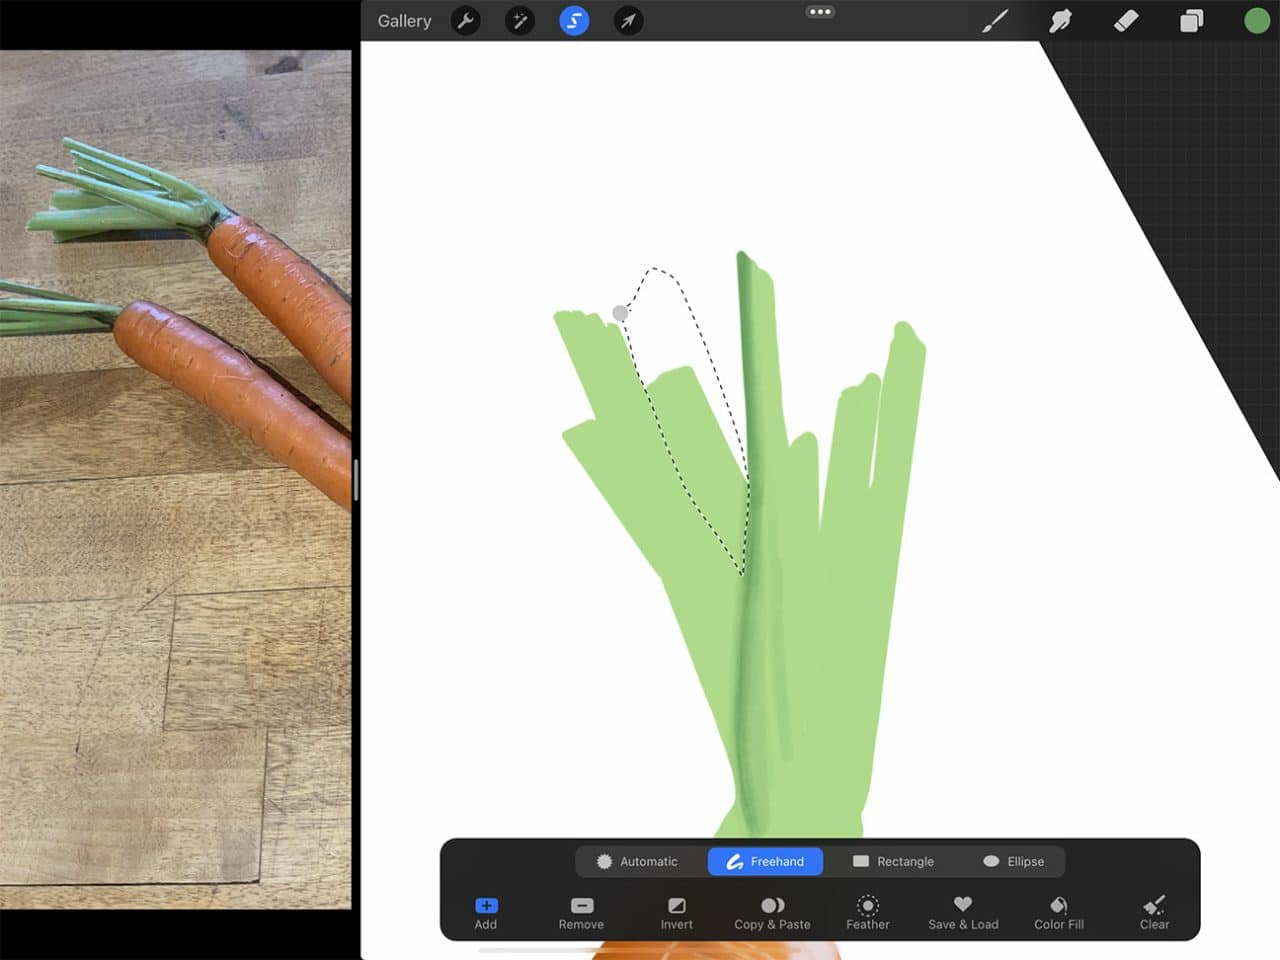
Since there are a lot of crisp boundary between each of the individual stems, you can isolate each of them to draw out separately. It is similar to the alpha lock method, however it is only for a portion of a layer, drawn out in whatever shape you want, that you can control.
To do this, tap the lasso tool and then draw around the stem you want to start with. Then tap the “brush” tool, and voila, you have your isolated portion of that layer to draw upon. Now you can create those fine gradients, lighter along the top, darker along the bottom, without smudging into the rest of your green stems.
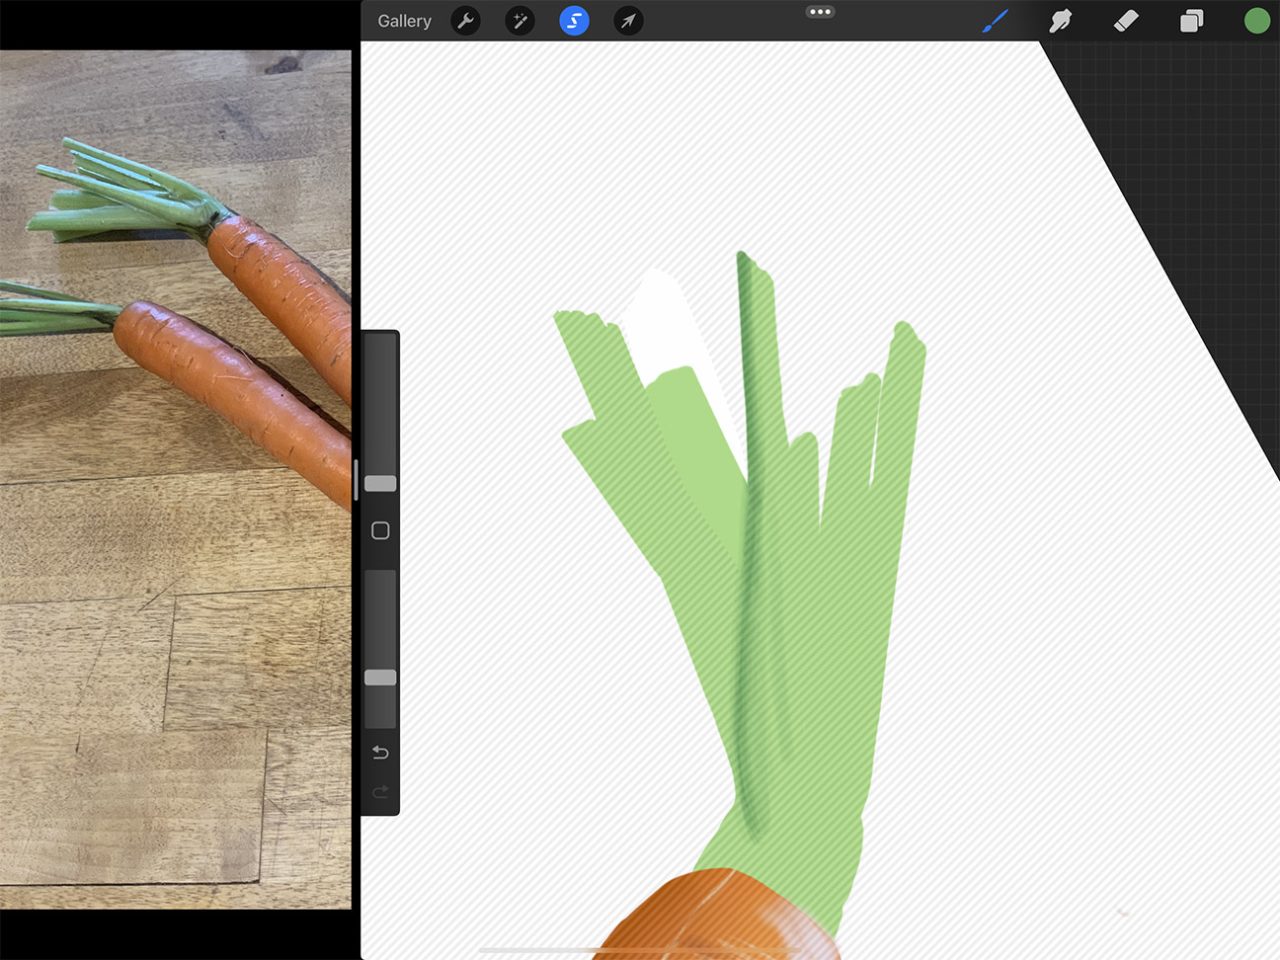
Utilize this method as many times as you like until you have a satisfying rendering with some nice contrast in light and dark areas. Feel free to change out your brush tips too for any sharper details like some of the veins.
How to Draw Carrots Step Six: Carrot “Discs”
Next you can fill in those classic round chopped carrot discs. You’ll do them one at a time, but repeat the process for each piece. Again, zoom in close on your reference photo to get a sense of how the colours and texture combine on the inside of the carrot. At its basic level it is a dark circle at the centre, surrounded by a lighter mottled ring, and then a paler and thin circle around the outside.
This is where experimenting with different brushed may be helpful in mimicking the texture you are seeing. I tried a few, but ended up settling on a combination of “damp brush” under “painting,” and “gouache,” also under “painting.” I also went in at the end with the gouache brush reduced down to its smallest size and drew in a lot of the finer details manually.
For any of the pieces where the skin on the side is showing, you can utilize the lasso drawing technique again to isolate the skin and create that clean edge.
For the last carrot disc, I utilized another digital drawing trick that can come in handy. I figured I could get away with just copying one of the carrot discs I had already drawn and duplicating it for this last one. To do this, use the lasso tool to draw around the shape you want to duplicate. At the bottom of your screen in the lasso sub menu you’ll see “copy and paste” as the fourth option. Just tap that and Procreate will make a copy of your selection and paste it on a new layer.
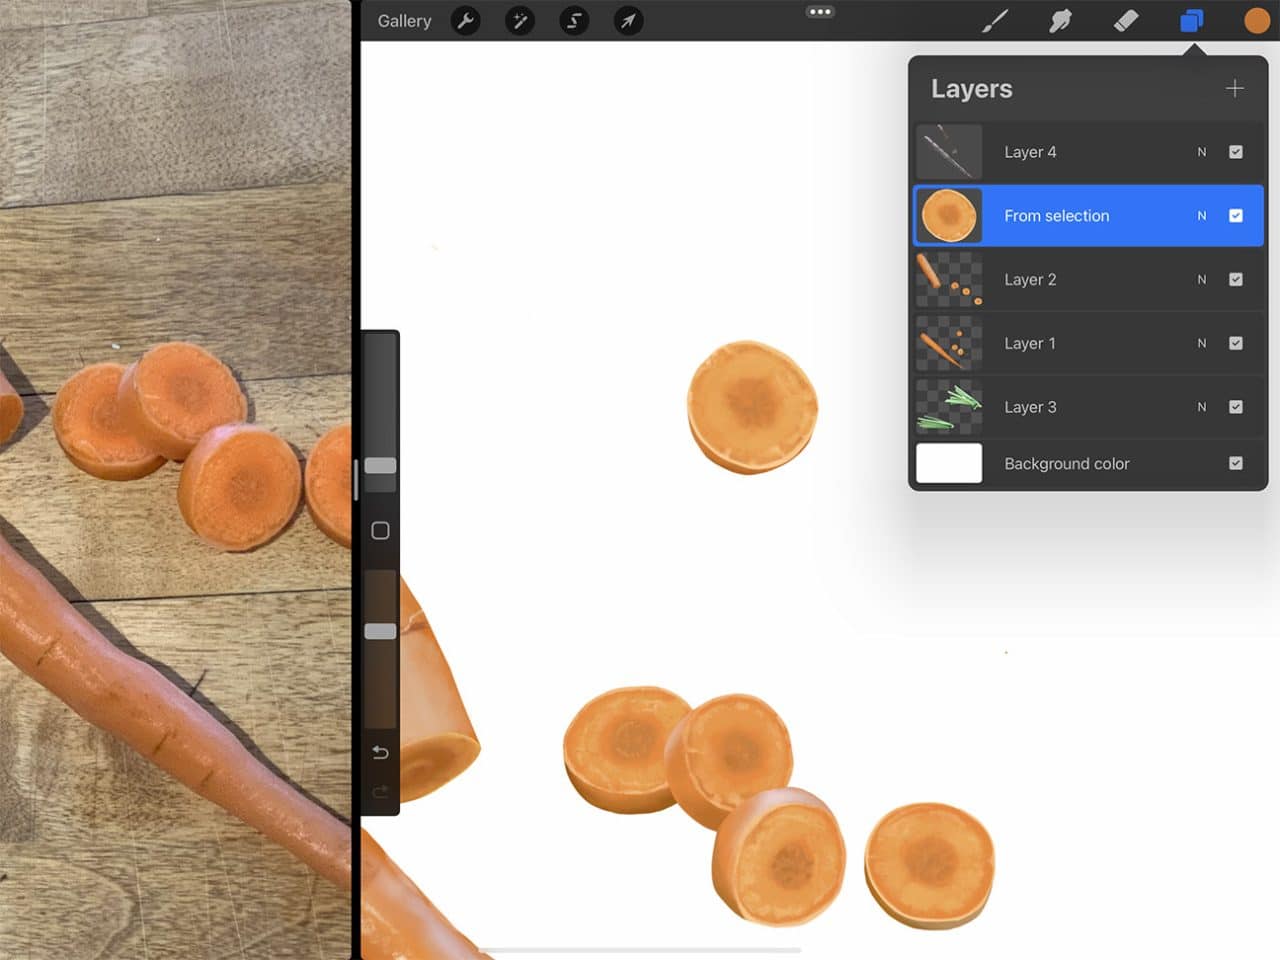
It will put it in the exact spot you copied it from, so just tap the curser tool to select the copy and then you can drag it to whichever position you like! (I rotated mine a bit just so that it would look at least slightly different from what I copied it from).
How to Draw Carrots Step Seven: Shadows
Finally, to complete the drawing I added some shadows to ground the carrots.
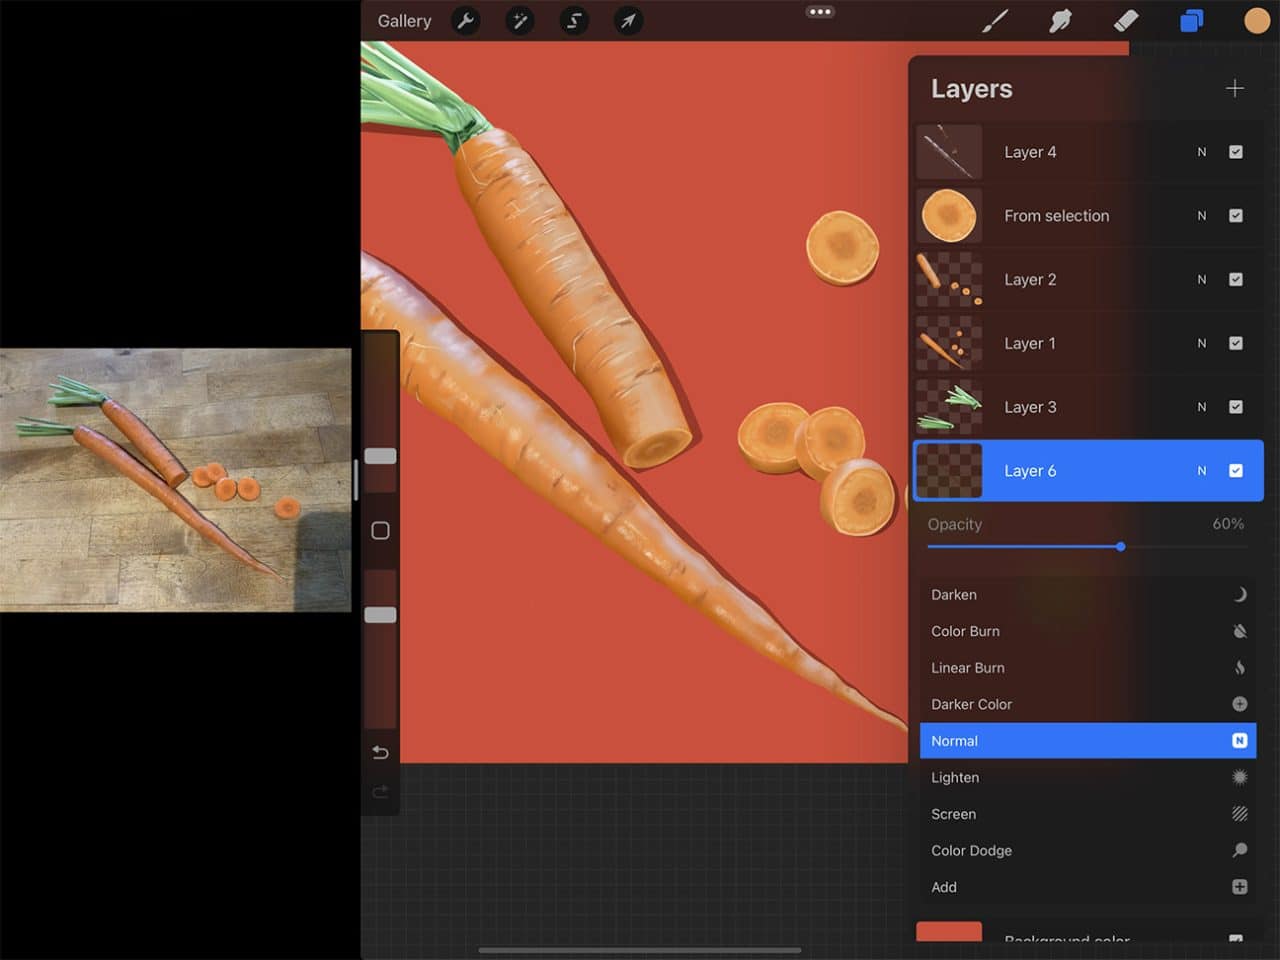
First however I chose a background colour. You can do so by opening the layers menu and tapping the “background colour” layer. I went with a bright red, seduced by how bold it looked against the bright orange and how it complimented the bright green of the stems.
For the shadows, choose a colour that is a much darker shade of your background colour. Once again start on a new layer positioned below the carrot layers. Draw out your shadow shapes with a clean-edged brush (like the technical pen) and fill them in.
You can then adjust the opacity of your shadows until they match the contrast level in your reference photo. To do so, open the layers menu, then tap the “N” on the shadow layer. Then you can adjust the slider to the transparency of your liking.
Helpful tips:
- To return to a colour you’ve already used, tap with one finger on the area with the colour you want to reselect, and hold. A magnifying circle will pop up and you can move that to the exact colour spot you want. Lift your finger and it will select that colour for your brush.
- You can zoom in and out by “pinching” the screen with two fingers. Don’t forget you can zoom in for areas with small details. You can also rotate the canvas using the two-finger pinch (rather than turning the iPad itself around, an inevitable habit when you’re used to turning your piece of paper around – there is an easier way!
You May Also Enjoy Reading…
- How To Draw Pears
- How To Draw A Broccoli
- How To Draw a Lemon
- How To Draw A Candle
- How To Draw Tomatoes
- How To Draw an Orange
- How To Draw Potatoes
- How To Draw Fish
- How To Draw Mountains
- How To Draw A Cottage
- How To Draw A Bottle
- How To Draw Shoes
- How To Draw Realistic Animals
- How To Start a Vlog: Purchase the Best Equipment for Vlogging
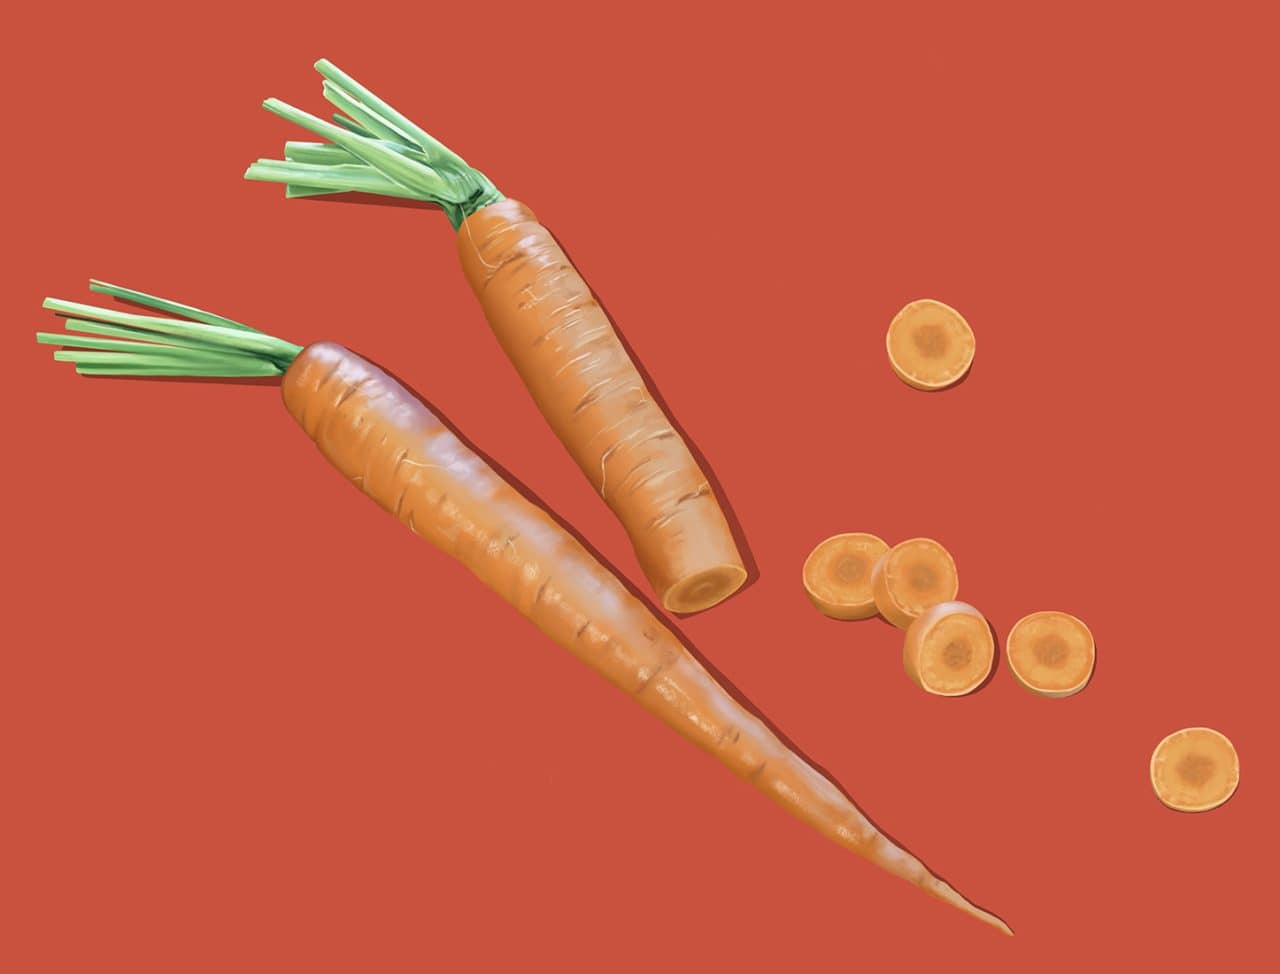
You’ve Completed our Realistic Carrot Drawing Tutorial!
You’ve now mastered how to draw carrots!
If you’re someone who draws or paints a lot, you know it’s possible to keep going and going and tweaking and tweaking into eternity. And truthfully Procreate makes falling into this even easier.
The up side, however, is that you can leave the piece alone for a time, and then very easily pick up where you left off, without having to get all of your paint and supplies out.
All that said, you will know when it’s done, and for a satisfying finish to your digital drawing experience, you can utilize one of my favourite Procreate features – timelapse video.
By default, Procreate records your entire drawing process (you can opt to turn this off, but really why?) You can play it all back in high speed when your drawing is complete. It’s a fun thing to watch and a fantastic thing to share with curious fans of your art.
If you’re a freelance illustrator, find that offering a timelapse video of your clients’ work acts as a competitive advantage. And better yet, offering a video that showcases the creation of your carrot drawing requires no additional time or money.
By using this Procreate tutorial as your step-by-step drawing guide for how to draw carrots, I’m sure you will be very satisfied with your result. Once you’ve gone through the motions from start to finish you can experiment and settle into your own process.
This medium has so many possibilities that you can really let your creativity run wild. Feel free to add a bit of sparkle, or a more dynamic background. Procreate has so many fun features and brushes to try. So dive in, go digital and have fun!
Best Illustration Apps
This story offers a step-by-step Procreate tutorial on how to draw carrots. It’s important to note that there are several other drawing apps you can use on iPad Pro when drawing carrots. Here are just a few:
- Notes: The Apple sketch app that comes with your iPad! Simple, easy to use for quick sketches, free and fast. Though for serious drawing you may want to seek apps with more robust options/tools. Price: FREE
- Adobe Illustrator Draw: This app is for creating vector graphics, with a very intuitive interface. It can also sync with Adobe’s Creative Cloud, meaning you can transfer your work between the iPad and desktop no problem. Price: FREE with Creative Cloud subscription, monthly plan prices vary.
- Inspire: Fast and nicely responsive, with a huge variety of customizable tools, and over 80 brushes. Great for beginners and intermediates alike. Price:$13.99 CAD, $27.99 for Pro Version.
- Procreate: Easily one of the most popular drawing apps, it works seamlessly with Apple Pencil, is highly responsive and offers an excellent variety of tools, all presented in a terrifically simple interface. Price: $13.99 CAD
If you’re a newbie digital illustrator we also suggest purchasing Beginners Guide to Digital Painting in Procreate, iPad and iPad Pro for Dummies, a protective iPad cover and Apple Pencil Case.
Procreate Tutorial: The Benefits of iPad Pro
- The process is very similar to drawing using traditional methods on paper. You’ll be delighted by how intuitive it is, and how for the actual drawing part, you don’t need to re-learn anything.
- Streamlined process. All of your supplies – camera, reference photos, paper, pens, pencils, eraser, pencil sharpener, paint and paint brushes, are all combined into one place – iPad Pro and the Apple Pencil.
- The ability to undo when your pen stroke wasn’t quite right. You can also edit certain elements after the fact. The thickness of that piece is too much, I don’t quite like the colour I used here. All of that can be fixed!
- The ability to work in layers, drawing or colouring over or under certain elements without worrying about accidental erasing or colour contamination.
- You aren’t tethered to your desk, you can get comfy and work wherever you like. And that includes outside your own home too.
- Easy transferability/sharability of your art. Your finished product is already in a format that you can add to your illustration portfolio online, share on your social media, etc. No need to arrange a high quality scan or professional photograph.
- The ability to replicate elements, (for patterning, for example) rather than needing to hand-draw the same thing over and over.
If you’re a freelance illustrator looking to up your game, getting familiar with this medium will benefit you tremendously. And if you are an amateur who just loves to draw, looking to have fun creating carrots or other still life drawings, iPad Pro and Apple Pencil can help you do things you might not have thought possible.
Some of the links in this story use affiliate links. This means that if you make a purchase through our site, Dobbernationloves will earn a small commission at no extra cost to you. Your support helps us to produce comprehensive content.